Now that November has arrived, we are transitioning from Halloween ghosts to Thanksgiving and holiday festivities. The fall and winter season is the perfect time to gather with friends or family and partake in some fun activities like creative cardmaking! Our DIY expert has put together some easy ways to craft your very own holiday cards that will delight each and every recipient.

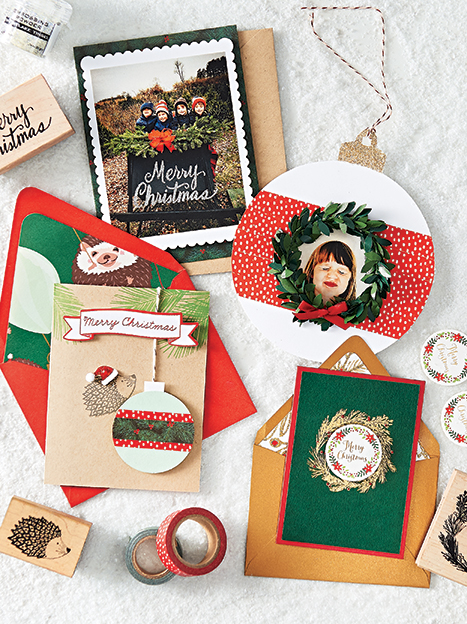
Ornament Photo Card
- Adhere five strips of washi tape to the center of an ornament die cut shape.
- Print and trim your photo to approximately 2 ½” round.
- Adhere the photo to the center of the ornament with a tape runner..
- Tie a bow around the wreath with red ¼” satin ribbon..
- Mount the wreath to the center of the ornament with Zots.
- Coat the ornament cap with a glue stick and cover with glitter.
- String the ornament with ribbon or twine and hang from your tree!

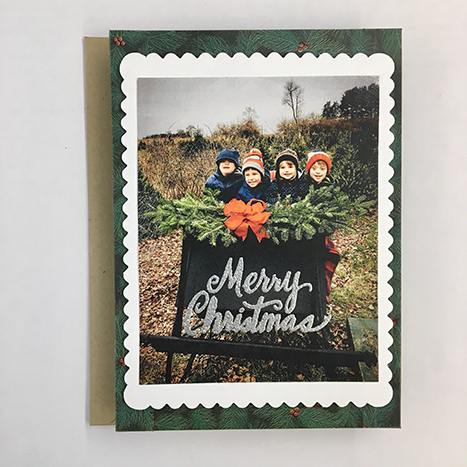
Scallop Photo Card
- Print and trim your photo to roughly 3 ½” x 5”
- Stamp “Merry Christmas” on the photo with Versamark ink, coat with silver embossing powder and heat set.
- Adhere the photo to a white A2 scallop card with a tape runner.
- Adhere washi tape around the border of an A6 folded card.
- Mount the scallop card to the A6 folded card with foam squares.
- Pair with a Paper Bag A6 envelope.
- Take it up a notch: line the envelope with your favorite holiday wrap using our easy envelope liner templates!

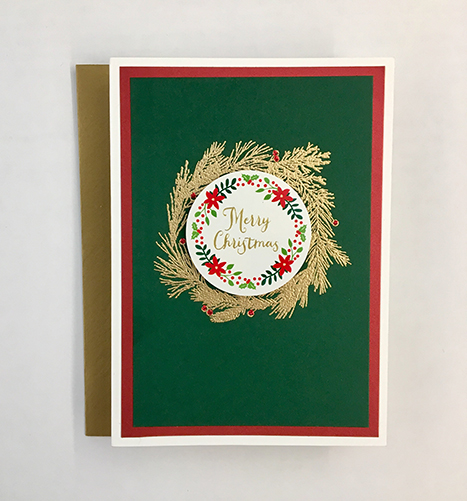
Merry Christmas Wreath Card
- Have fun playing with different paper layering with your paper color of choice.
- Stamp the center of the paper with the wreath stamp in Versamark ink. Coat with gold embossing powder and heat set.
- Mount that paper on to a 4 bar folded card with a tape runner.
- Adhere a Merry Christmas sticker to the center of the card and pair with an Antique Gold envelope.
- Take it up a notch: use a gold floral wrapping paper to line your envelope!

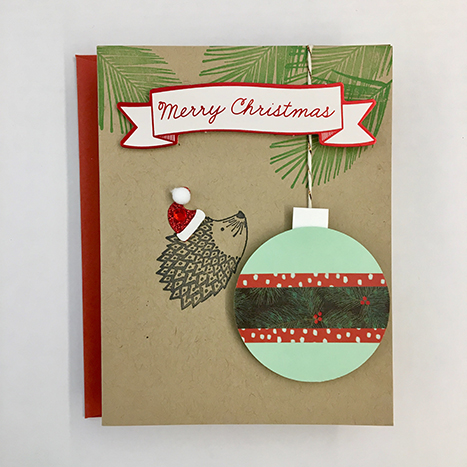
Hedgehog Card
- Stamp the top edge of a Paper Bag A2 folded card with the palm leaf stamp in this grass colored ink.
- Adhere 3 strips of washi (about 3” long) to a piece of Mint paper.
- Punch a circle out of the Mint cover using the 2 ¼” circle punch.
- Cut a small scrap of paper for the ornament cap and tape it to the back side of the ornament so that it is poking out the top.
- Tape a piece of twine (about 3” long) to the back of the ornament.
- Mount the ornament to the card with foam squares. Wrap the twine around the top edge of the card and tape it to the inside.
- Stamp the hedgehog stamp in Charcoal Chalk Ink as shown (as if he is perched on the ornament).
- Adhere a Santa hat sticker to his head.
- Adhere a Merry Christmas sticker to the top center of the card and pair with a Persimmon A2 envelope.
- Take it up a notch: line the envelope with the hedgehog Christmas wrap!
We’d love to see all of your holiday creations! Share them with us on Instagram using #PaperSource.


The card behind the A2 scallop card looks like a nice design. Is it a folded card? And what is the name of it?
Thank you
Hi Donna, that’s just a normal A6 card with a border of holiday washi tape on it! https://www.papersource.com/item/Holiday-Plaid-Flurry-Pine-Branch-Washi-Tape/2905_019/10001920.html
You have a lot of these DIY card ideas from previous years. Why not put them on the blog as well? They’re great designs.