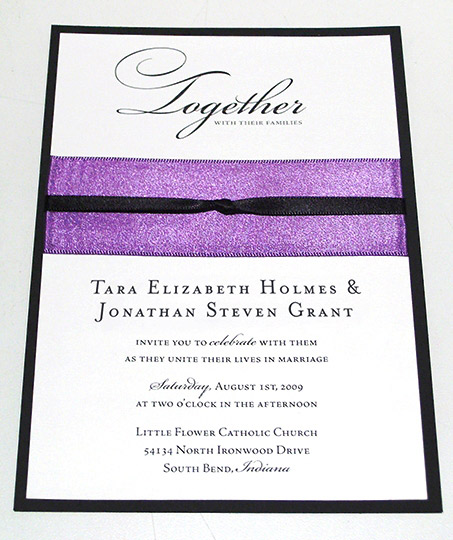
I just love the “aha!” moments when I make a discovery that saves time or turns the ordinary into the extraordinary. I had one of those wonderful moments when putting together my sister’s wedding invitations. My sister loved the richness of our satin ribbon, but the idea of tying a bow didn’t appeal to her. My solution? Use the ribbon as a decorative band for a pop of color.
In my quest to perfectly adhere our 1 1/2″ Satin Ribbon to the wedding invitations I reviewed all the standard options. Glue stick? Messy and time consuming. Double-sided tape? Would create visible ridge from the tape’s edges. Zots? Bumpy and lumpy. Liquid glue? Would soak through the ribbon creating splotches. Ugh! I was out of options.
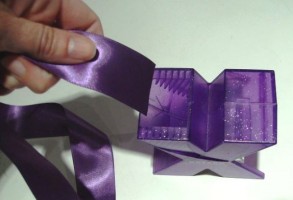
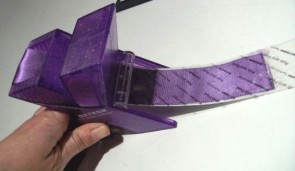
Thankfully, I don’t give up easily. I spied our Baby Xyron, a great little machine that turns almost anything into a sticker – including ribbon… Aha! The results could not have been better. The ribbon adhered smoothly to the paper and the process was clean and quick. The final product was more than I’d hoped for – perfect wedding invitations with an elegant ribbon embellishment. I also layered on a 1/4″ Satin Ribbon with a little knot in reference to the happy occasion.
Read on for a list of materials and instructions needed to create wedding invitations in the style I did for my sister. The printed wedding invitation (so easy using our online print templates) accented with the satin ribbons is mounted onto a backing creating layers or textures and colors. A beautiful design for any special occasion!
–Sarah, Paper Source Oak Park Store
PS colors: rhubarb & moss
Latest fave: Owl Placecard Kit
Materials Needed:
A7 flat cards (backing)
A7 enclosure flat cards (printed invitation)
1 1/2″ Satin Ribbon
1/4″ Satin Ribbon
Baby Xyron
Baby Xyron refills
Zots
Quick Dry Adhesive
Scissors
Instructions:
1. Print the invitation onto A7 enclosure flat cards leaving enough room between the text for the ribbon embellishment. Try our Script and Serif invitation template and add a couple extra lines of space. Additional invitation print templates are available on our website.
2. Cut the 1 1/2″ Satin Ribbon into 6″ strips and guide it through the Baby Xyron. Be careful not to move too quickly or the ribbon may bunch or fold as it goes through. Time saver: pull the whole ribbon spool through the Xyron, then cut the 6″ strips.
3. Pull off the waxy backing from the Xyron adhesive and place the ribbon (adhesive side down) onto each printed invitation. Wrap the ends around the back and secure.
4. Cut 6″ strips of the 1/4″ Satin Ribbon and tie a knot in the center. Place the knotted ribbon over the 1 1/2″ ribbon, wrapping the ends around the back of the invitation, then secure on the back with Zots.
5. Apply a thin line of Quick Dry Adhesive to the edges of the back of the printed invitation (you don’t need much) or apply Zots. Layer the printed invitation onto the A7 flat cards to create the backing.


This is one of my ideas for our invitations, and I’m so glad I had a baby Xyron on hand to make it possible! I am thinking of using the ribbon to wrap the corners (a la Martha: http://www.marthastewart.com/good-things/ribbon-photo-corners) of our square invitation instead of a band across the middle. I love the chocolate satin ribbon.
That’s beautiful! I love the way you used the purple ribbon. I’ll be linking to this.
Hi Sarah –
What is the font you used for the word ‘Together’ – I love the flourish on the capital ‘T’.
thanks,
~zoie in ks
Hi Zoie! The font I used was Bickham Script. It’s a wonderful font and I believe you can purchase it from adobe for about $40.
Thanks Sarah – your’re a jewel!!
I love this one too!
Hi Sarah –
Love this invitation! Beautiful! Great job. I has wondering which font was used for celebrate, Saturday & Indiana.
Thanks
LOl have had a xyron for ages and never use it. Can we still get refills for this?
thanks
Samantha
Hi Samantha- Our xyron refills can be found here: https://search.papersource.com/index/_/N-/Ntt-xyron
Hope this helps! -Jenn, PS Team