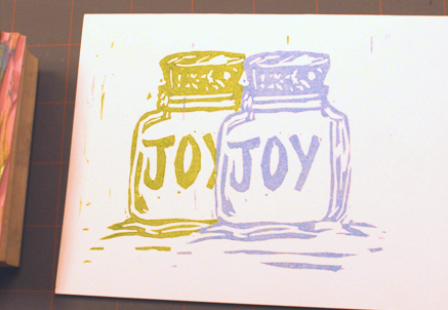
Masking is a very cool rubber stamping technique that involves layering rubber stamp images to create depth. By rubber stamping images one on top of the other using masking you give the illusion that images are in front or behind each other. I’ve demonstrated this technique in the 5 steps below – give it a try to add visual interest to your next rubber stamping project!
Here are the materials I’ve used in this demonstration:
• My own hand carved rubber stamp
• Sky Blue Color Box Inkpad
• Moss Color Box Inkpad
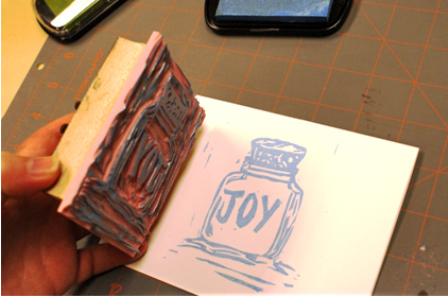
1. Stamp Your First Image: For this demonstration I’m masking using a single rubber stamp with two different ink colors. The first image you stamp will be the one in the foreground of your picture. Ink the rubber stamp in your first ink color and make your impression.
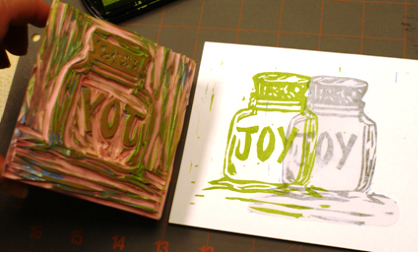
2. Create The Mask: Without re-inking your first rubber stamp, stamp the image onto a piece of scrap paper. This lighter impression keeps the ink to a minimum and prevents it from getting onto your fingers when working with the mask. Cut nice and tight along the stamped image – this cut out now becomes your “mask”.
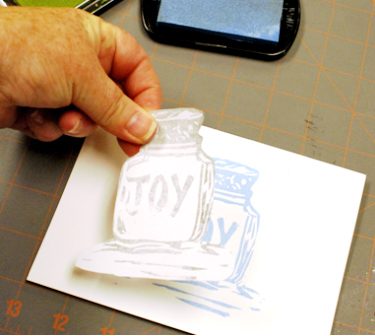
3. Position The Mask: Place the mask directly over your first stamped image lining it up perfectly. This protects your first stamped image.
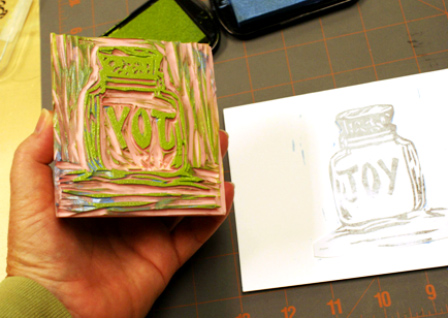
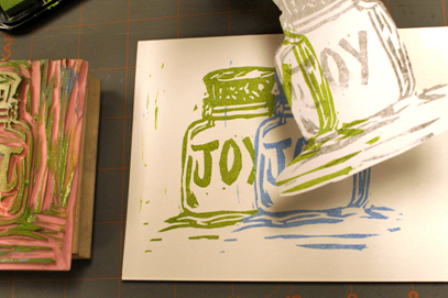
4. Stamp Your Second Image: Ink up your rubber stamp (either the same or a different rubber stamp than the first). Here I’ve chosen a new ink color. Stamp your second image – a portion will be stamped onto the mask where you want the first image to overlap the second image.
5. Remove The Mask: Peel off the mask, and Voila!…two overlapped images.
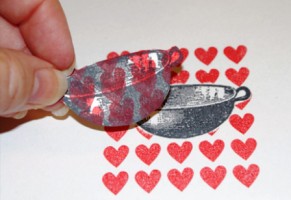
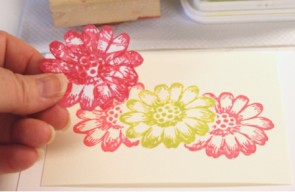
Have fun with layering images, creating backgrounds, and all kinds of “front and back” combinations. Below are other examples of masking using some of my favorite rubber stamps: Hearts Pattern Rubber Stamp, Kettle Rubber Stamp, and Daisy Rubber Stamp.
–Linda
PS colors: chartreuse & pool
Latest fave: Saddle Stitch Notebooks


Very cool and good to know!
this is a great, yet simple, idea!
Great tutorial! Thanks!
What a fun technique! I love the hearts with the kettle!
I love that the cuff of your sweater matches the green ink! Do you have a different one for every color ink? 🙂
This is such a great idea! I’m going to try it and feature it on my blog!
Thanks, Katie
So cool — thank you for sharing these tips. Please, more rubbing stamping tips!
I don’t make a lot of things with rubber stamps… but this is a GREAT tip! I love little tips like this. I’m keeping this one in my pocket for the time I do make something with stamps.
What a fantastic method! I’ve also done a similar type of layering by covering a part of the rubber stamp surface with paper, but this version looks much more fool proof. Thanks for this idea!
I LOVE this idea. I’m totally going to be using it soon. Maybe I can figure out how to incorporate it into my Christmas cards. Thanks!